Autoload
Digifi’s autoload feature equips an analyst with self-service data prep to accelerate the most time-consuming (and sometimes most tedious) aspects of analysis. The result of using autoload is a significant improvement in productivity and accuracy.
Requirements
Autoload only works with a comma separated (CSV) file format. The required file naming convention is [your_file_name].csv.
Snapshot Dates
Every file and row loaded into the database is tagged with a `data_date` value representing the file extract date of the data. Autoload does not require you to include a date in your file name, in which case, autoload will date stamp the data in the database with the date at run time. However, if you would like to tag your data with a file or snapshot date, simply include the date in your file name per the naming convention [your_file_name_YYYYMMDD].csv where YYYY denotes the 4-digit year, MM the 2-digit month, and DD the 2-digit day.
How it Works
Autoload is a series of data management routines that trigger when a file is queued for processing. Unlike batch processing, where configuration files and strict naming conventions are enforced, autoload conforms file names to a Digifi standard, initiates the ETL engine, and logs progress to its queue without any prior configuration. Simply move a CSV file into the autoload directory and wait for processing to complete.
Default Settings
The default configuration for an autoload process is as follows:
Autoloading Your First File

- Connect via RStudio. Click here for help.
- Navigate to: digifi > etl > autoload
- Click ‘Upload`
- Click `Browse` to locate your file
- Click `OK`
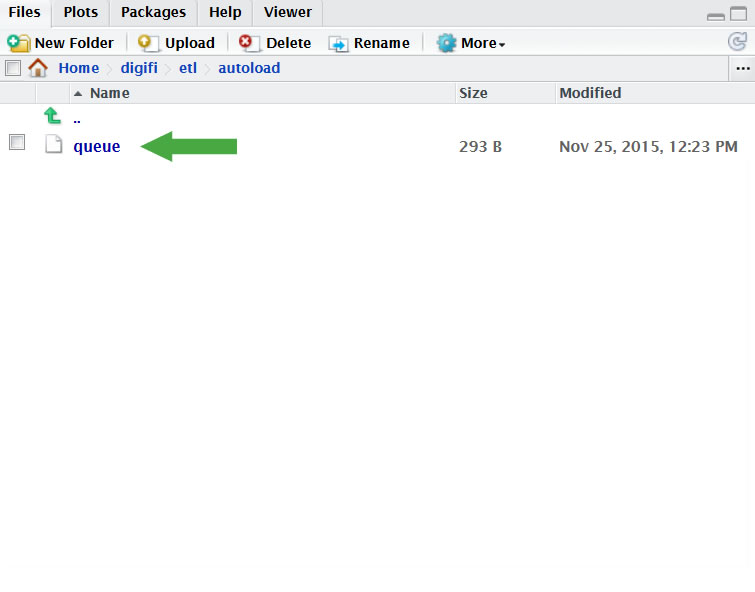
- Autoload will start processing once your file upload has finished
- Your file is then moved to the data directory during processing
- The `queue` file persists while processing is underway (it will disappear when processing has finished)
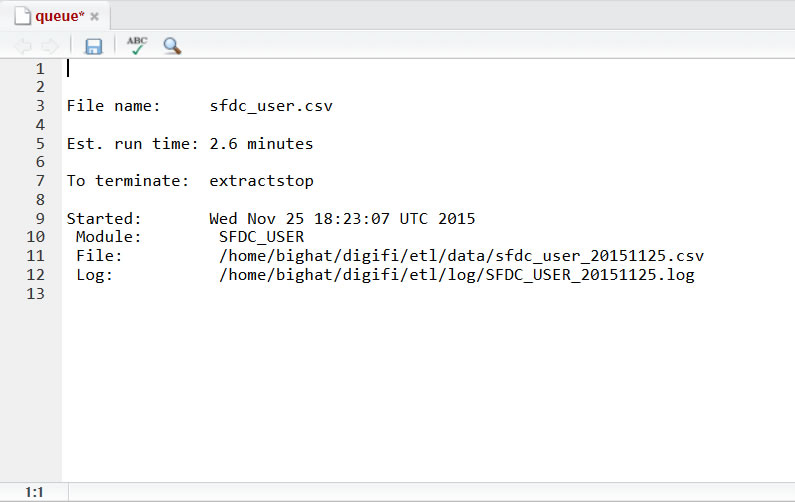
- Click on `queue` to view processing details
- Note how file `sfdc_user.csv` was renamed to `sfdc_user_20151125.csv`
- For your information…
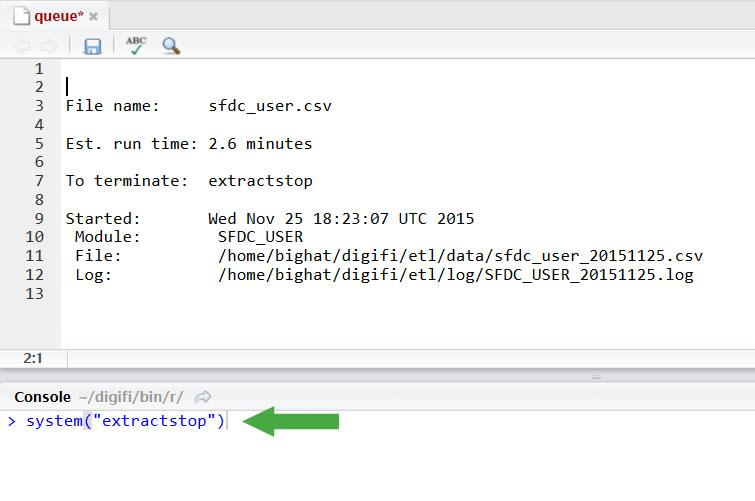
You can kill your process for whatever reason - To do so, use command:
system(“extractstop”)
- Wait for the `queue` file to disappear
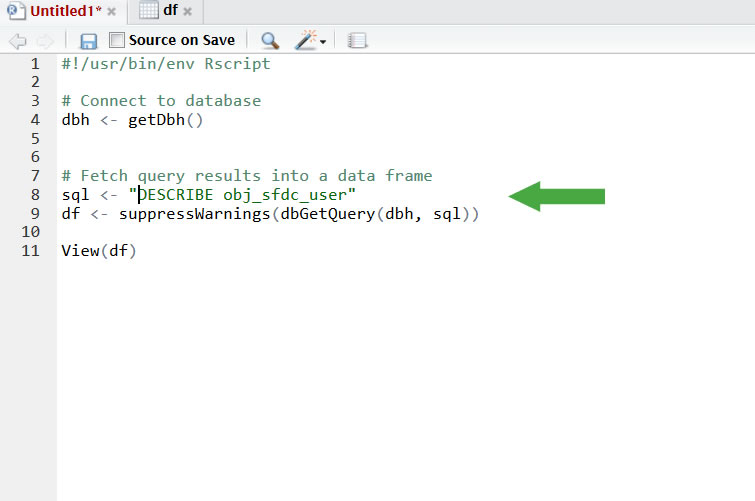
- Select File > New File > R Script
- Copy and paste the following syntax into the window:
#!/usr/bin/env Rscript# Connect to database
dbh <- getDbh()# Fetch query results into a data frame
sql <- "DESCRIBE obj_[your_file_name]"
df <- suppressWarnings(dbGetQuery(dbh, sql))View(df)

- Replace [your_file_name] with the actual file name
- Click the `Source` drop-down menu
- Select `Source with Echo`
- View how your file was loaded in the database
- Change your SQL statement to fetch the data you want in your analysis
- Copy and paste R syntax from a Digifi example to get started with your analysis